It is easy to print a single envelope or label from iData 2.1. Once you have your templates set up with your return address and any graphics you may want, it is just a matter of locating the record that has the address you want, and clicking the Envelope Toolbar Button. If the button does not appear in your iData 2.1 toolbar, you can add it with Customize Toolbar... in the View menu. This works they way most toolbars work in OS X. A sheet of buttons drops down, and you drag the button you want to the desired location in the toolbar.
For more information on setting up the Address Block and templates see the following topics:
Chapter 2-9 (Address Block Settings)
Chapter 2-39 (General Template Information)
Chapter 2-40 (Editing Template Designs)
Chapter 2-41 (Editing Envelope Page Layouts)
Chapter 2-42 (Editing Label Page Layouts)
Chapter 2-43 (Template Design Commands)
Printing a Single Envelope
1. Locate the iData record that contains address you want printed on the envelope.
2. ![]() Click the Envelope Toolbar Button. A sheet
will drop down with either an envelope or label template showing the address
from the current record.
Click the Envelope Toolbar Button. A sheet
will drop down with either an envelope or label template showing the address
from the current record.
Address Source
Normally, the address will come from the current record as defined in the Address Block Datafile Settings. However, you can use an address that you have copied to the Clipboard by holding the option key down while clicking the Envelope Toolbar Button.
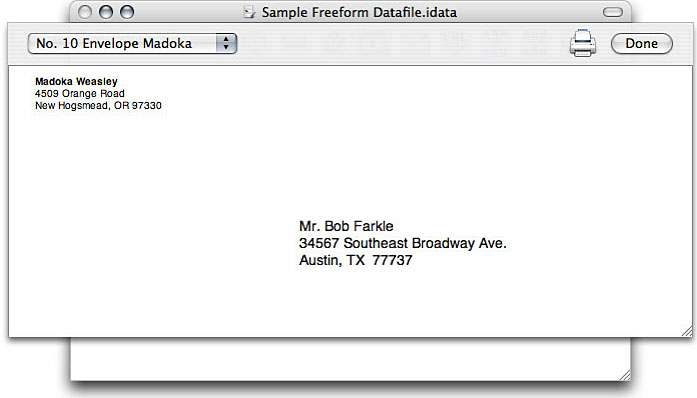
3. Select the envelope template you wish to use from the popup menu on the top left of the envelope sheet. In the above illustration it says, "No. 10 Envelope Madoka". Your template will have a different name.
![]()
4. If it all looks right, Click on the printer button just to the left of the "Done" button. This will bring up the standard Print window for your printer. Make sure the proper printer and presets are chosen in the window and click the "Print" button.
5. When you are sure the envelope has printed properly, click the Done button.
Printing a Single Label
Printing a label is very much like printing an envelope (see above), except that you can select which label on the sheet you wish to use. When you have selected the label template in the popup menu, simply click on the label you wish to have the address printed on. The address will jump from the upper left label to the one you have chosen.
